Hystrix集群监控turbine
前面Dashboard演示的仅仅是单机服务监控,实际项目基本都是集群,所以这里集群监控用的是turbine。
turbine是基于Dashboard的。
先搞个集群;
再microservice-student-provider-hystrix-1004项目的基础上再搞一个microservice-student-provider-hystrix-1005
代码和配置都复制一份,然后修改几个地方;
第一 yml配置
server:
port: 1005
instance-id: microservice-student-hystrix:1005 #客户端实例名称
第二 启动类改成StudentProviderHystrixApplication_1005
这样的话 就有了 hystrix集群服务;
我们新建项目microservice-student-consumer-hystrix-turbine-91
pom.xml加下依赖
<dependency>
	<groupId>org.springframework.boot</groupId>
	<artifactId>spring-boot-starter-actuator</artifactId>
</dependency>
<dependency>
	<groupId>org.springframework.cloud</groupId>
	<artifactId>spring-cloud-starter-turbine</artifactId>
</dependency>
application.yml
server:
port: 91
context-path: /
eureka:
client:
service-url:
defaultZone: http://eureka2001.java1234.com:2001/eureka/,http://eureka2002.java1234.com:2002/eureka/,http://eureka2003.java1234.com:2003/eureka/
turbine:
app-config: microservice-student # 指定要监控的应用名称
clusterNameExpression: "'default'" #表示集群的名字为default
spring:
application:
name: turbine
新建启动类:StudentConsumerTurbineApplication_91
加注解:@EnableTurbine
package com.java1234;

import org.springframework.boot.SpringApplication;
import org.springframework.boot.autoconfigure.SpringBootApplication;
import org.springframework.boot.autoconfigure.jdbc.DataSourceAutoConfiguration;
import org.springframework.boot.autoconfigure.orm.jpa.HibernateJpaAutoConfiguration;
import org.springframework.cloud.netflix.turbine.EnableTurbine;

@SpringBootApplication(exclude={DataSourceAutoConfiguration.class,HibernateJpaAutoConfiguration.class})
@EnableTurbine
public class StudentConsumerTurbineApplication_91 {

	public static void main(String[] args) {
		SpringApplication.run(StudentConsumerTurbineApplication_91.class, args);
	}
}
测试:
先启动三个eureka,然后把1004 1005 带hystrix的服务都启动;
microservice-student-consumer-80这个也启动,方便测试;
dashboard,turbine启动;
这样的话 http://localhost/student/getInfo 就能调用服务集群;
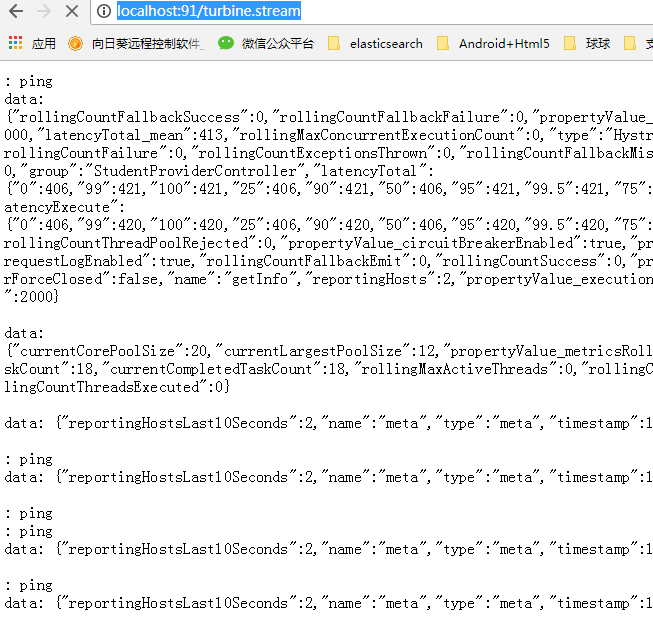
http://localhost:91/turbine.stream 可以监控数据,实时ping 返回data

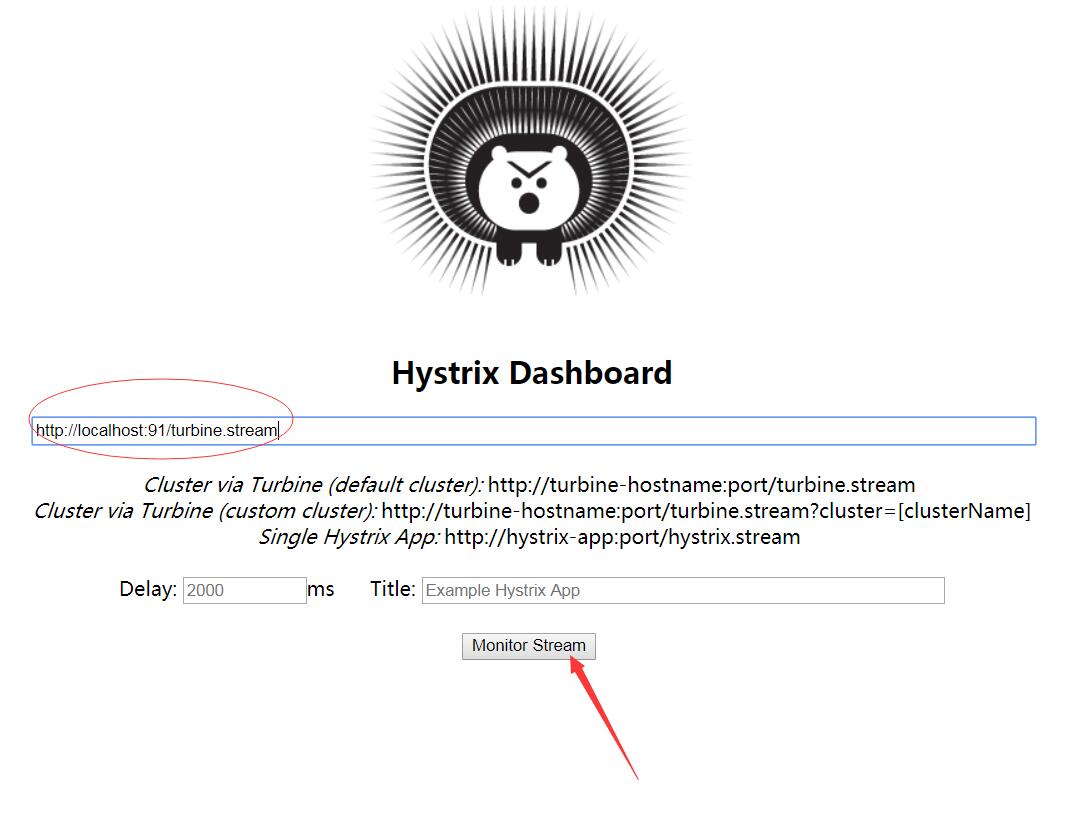
进入仪表盘,输入地址

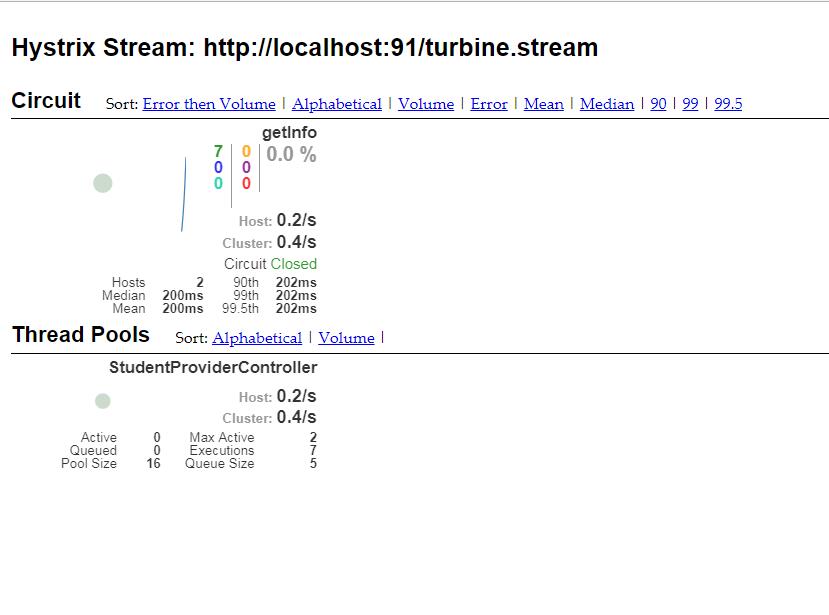
点击 进入集群监控仪表:

下一篇:IDEA开发工具简介


- Java核心基础(145)
- Mysql(2)
- Docker(35)
- Dubbo(7)
- 007项目(0)
- SVN(22)
- QQ第三方登录(6)
- mybatis-plus(20)
- Mycat(30)
- Layui(2)
- 微信扫码登录(4)
- Git(50)
- SpringCloud(33)
- Tomcat(6)
- 支付宝接口(3)
- NodeJs(1)
- IDEA(24)
- SpringBoot(11)
- Nginx(24)
- Vue.js(50)
- jsoup(6)
- shiro(1)
- hibernate(1)
- EhCache缓存框架(4)
- webservice(10)
- CAS单点登录(7)
- elasticsearch(31)
- Redis(17)
- maven(6)
- 活动(20)
- centos(25)
- log4j日志(8)
- IT之路(26)
- activiti(26)
- 随心生活(19)
- java爬虫技术(14)
- 网站SEO(2)
- httpclient(7)
- htmlunit(10)
- 2026年01月(1)
- 2021年10月(1)
- 2021年02月(3)
- 2020年11月(3)
- 2020年10月(4)
- 2020年09月(7)
- 2020年08月(18)
- 2020年07月(21)
- 2020年06月(37)
- 2020年05月(17)
- 2020年04月(12)
- 2020年03月(10)
- 2020年02月(14)
- 2020年01月(12)
- 2019年12月(15)
- 2019年11月(27)
- 2019年10月(5)
- 2019年09月(1)
- 2019年08月(4)
- 2019年07月(28)
- 2019年06月(16)
- 2019年05月(4)
- 2019年04月(3)
- 2019年03月(2)
- 2019年02月(7)
- 2019年01月(20)
- 2018年12月(2)
- 2018年11月(5)
- 2018年10月(30)
- 2018年09月(11)
- 2018年08月(5)
- 2018年07月(9)
- 2018年06月(4)
- 2018年05月(4)
- 2018年04月(3)
- 2018年03月(7)
- 2018年02月(6)
- 2018年01月(13)
- 2017年12月(3)
- 2017年11月(10)
- 2017年10月(1)
- 2017年09月(9)
- 2017年08月(12)
- 2017年07月(19)
- 2017年06月(21)
- 2017年05月(1)
- 2017年04月(12)
- 2017年03月(13)
- 2017年02月(12)
- 2017年01月(14)
- 2016年12月(8)
- 2016年11月(25)
- 2016年10月(16)
- 2016年09月(13)
- 2016年08月(20)
- 2016年07月(12)
- 2016年06月(36)
- 2016年05月(10)
- 2016年04月(19)
- 2016年03月(14)
- 2016年02月(23)
- 2016年01月(1)